use your confirmation entry
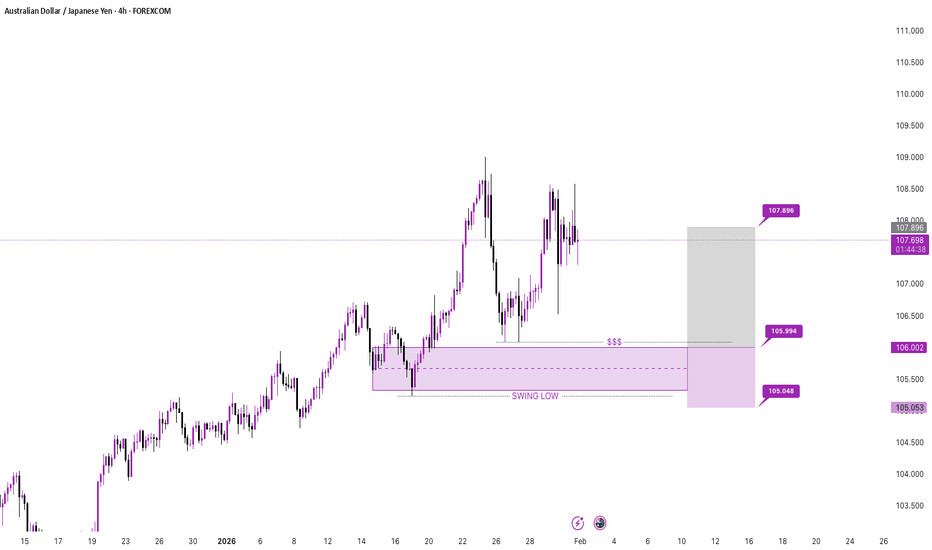
I have a long position (buy) trading setup on the AUD/JPY currency pair using the 4-hour (4h) timeframe chart from FOREX.com on TradingView.
Here is how I set up my trade:
Analyzing the Chart: I am analyzing the AUD/JPY chart on a 4-hour timeframe.
Identifying the Demand Zone (SWING LOW & SSS): I identified a potential strong support or demand area, marked by the purple rectangle between approximately 105.816 and 106.002. I labeled this area "SWING LOW" and "SSS" (Liquidity) because I anticipate the market might take out stops below this low before moving up.
Setting Entry, Stop Loss, and Take Profit:
My entry point for the long trade is within or just above this demand zone.
I placed my predetermined stop loss (SL) level at the bottom purple horizontal line/box at 105.048 to limit potential losses.
I set my predetermined take profit (TP) level at the top purple horizontal line/box at 107.898 as my price target for closing the position for a profit.
Visualizing Risk-to-Reward: The gray box helps me visualize the distance between my entry and take profit compared to my entry and stop loss, showing my potential risk-to-reward ratio.
Following the Trend: I am "buying the dip" within an established uptrend, as the price action has shown a general bullish movement since December 2025.